Tuesday, July 28, 2009

Max (Measurement and Automation Explorer)

மேக்ஸ் என்பது Measurement and Automation Explorer இன் சுருக்கம் ஆகும்.

லேப்வியு (LabVIEW) உபயோகிக்க நினைப்பவர்கள் அவசியம் தங்களின் கணினியில் இதை நிறுவுதல் அவசியம் ஆகும்.

மேக்ஸ் என்னவென்று தெரிந்து கொள்ள நினைப்பவர்கள் முதலில் நம் கணினியில் உள்ள Device Manager பற்றி தெரிந்து கொள்வீர்களானால் மேக்ஸ்-ஐ எளிதில் புரிந்து கொள்ள ஏதுவாகும்.

உதாரணமாக Device Manager என்பது விண்டோசின் ஒரு பகுதி. அதாவது உங்கள் கணினியில் என்னவெல்லாம் இணைத்து உள்ளீர்களோ (Hardware) அவை அனைத்தையும் நீங்கள் இதன் மூலம் தெரிந்து கொள்ளலாம்.

உதாரணத்துக்கு நான் என் கணினியின் "Device Manager" இன் Screen shot ஐ கீழே கொடுத்துள்ளேன்.


என்னனென்ன Harware இணைத்து உள்ளேன் ..அவை அனைத்தும் சரியான முறையில் Install செய்யப்பட்டுள்ளதா ...அவை சரியான முறையில் இயங்குகிறதா என்றெல்லாம் நாம் அறிய முடியும்..

இல்லையா ?

ஓகே

இப்போ மேக்ஸ் க்கு வருவோம்.

மேக்ஸ் என்பது ஒருவகையான மென்பொருள்.
இதை
இங்கு சென்று தரவிறக்கி கொள்ளுங்கள்.
உங்கள் கணினியில் நிறுவியும் கொள்ளுங்கள்.


சரியா.. ?

இதுவரை சரியாக எல்லாம் இருந்தால் கவலை விடுங்கள்.
இல்லை எனில் மின் மடலில் தொடர்பு கொள்ளுங்கள்.


அடுத்து

மேக்ஸ் ஐ நிறுவிய பின் அதை திறந்தீர்களேயானால் கீழ் கண்டவாறு உங்களுக்கு தெரியும்.


தெரியுதா...

நீங்கள் என்ன வகையான Instrument களை LabVIEW மூலம் கட்டு படுத்த போகிறீர்களோ அந்த அணைத்து Instrument களையும் நீங்கள் இங்கு பார்க்கலாம்.


குறிப்பு : எந்த வகையான Hardware ஐயும் நீங்கள் கணினியில் இணைக்கும் போது அதற்குண்டான Driver களையும் Install செய்ய வேண்டும்.

சரியான முறையில் உங்கள் Instruments கணினியால் Recognize செய்யப்படுள்ளதா என அறிய மேற்சொன்ன மேக்ஸ் உதவுகிறது என்பதில் சிறிதளவும் ஐயம் இல்லை.

மேற்குறிப்பிட்டுள்ள Instruments என்பவை உதாரணத்துக்கு Power Supply / Multimeter / Power Analyzer / ...etc எது வேண்டுமானாலும் இருக்கலாம்.

நன்றி வணக்கம்!

Thursday, July 23, 2009

Top 10 Reasons to Use NI LabVIEW for Acquiring Data and Processing Signals

Ni's Newsletter:- 23 july 09.

1. Work Faster with a Graphical Approach

In the NI LabVIEW graphical development environment, you develop data acquisition systems using drag-and-drop graphical icons instead of writing lines of text. You can complete programs that take weeks to write with traditional languages in hours using LabVIEW, even if you have no programming experience.

2. Take Any Measurement from Any Sensor on Any Bus

You can choose from a variety of major buses and form factors including USB, PCI, PCI Express, PXI, PXI Express, Wi-Fi, and Ethernet. LabVIEW provides a single programming interface to all of these devices, resulting in seamless hardware and software integration. So, whether you are developing with a USB device or a PCI board, the code is the same.

3. Get Started Immediately with Open-and-Run Examples

There is no need to create your entire data acquisition system from scratch. LabVIEW includes several shipping examples for every common measurement task. Hit the ground running with open-and-run programs for virtually any setup, ranging from a simple one-channel measurement to a high-performance multichannel system featuring advanced timing, triggering, and synchronization across multiple devices. Simply select your hardware from autopopulated drop-down menus and click run.

4. Measure in Minutes with Express Functions

With LabVIEW, you can take your first measurement in just a few mouse clicks. Express functions help you program using interactive windows and simple drop-down menus. Configuring voltage, current, temperature, pressure, and sound measurements has never been easier. LabVIEW Express functions take you step-by-step through the configuration, helping you apply custom scaling and engineering units. Express functions also automatically detect your hardware and generate all of the necessary code for you, saving up to 80 percent of your development time.

5. Call Advanced Analysis Libraries with One Click

LabVIEW includes thousands of advanced analysis functions created specifically for engineers and scientists, all with detailed help files and documentation. With these powerful tools, you can perform advanced signal processing, frequency analysis, probability and statistics, curve fitting, interpolation, digital signal processing, and more. You can also extend LabVIEW with processing for applications including sound and vibration, machine vision, RF/communications, and transient/short-time duration signal analysis. For additional flexibility, you can integrate LabVIEW with algorithms developed in third-party software.

6. Create a Professional User Interface in Seconds

LabVIEW helps you quickly create a graphical user interface using hundreds of drag-and-drop controls, graphs, and 3D visualization tools. You can customize the position, size, alignment, scale, and color of these built-in controls in a matter of seconds from a right-click menu. LabVIEW also helps you create your own controls or incorporate custom imagery and logos. With programmatic access, you can alter the appearance of your user interface at run time.

7. Log Data and Generate Reports in One Easy Step

In LabVIEW, writing your data to disk or creating a custom report is as simple as calling one function. Native file formats are optimized for high-speed streaming, and LabVIEW provides easy integration with spreadsheet applications such as Microsoft Excel. LabVIEW also gives you the ability to attach descriptive information to your measurements, making them easier to reference offline.

8. Distribute Stand-Alone Applications

With the LabVIEW Application Builder, you can create stand-alone applications for programs that need to be deployed on a large number of systems. Distribute professional copies of software as end-use applications or provide developers with shared libraries for use in other development environments. LabVIEW makes it easy to create installers that bundle all the drivers and required run-time engines with your executables.

9. Do More with a Flexible, Scalable Software Platform

When you use LabVIEW, you learn more than just how to develop a data acquisition system. You gain proficiency in a framework that provides easy migration paths to innovative technologies such as real-time and embedded devices. For example, you can use the same graphical language you work with in your measurement application to target a field-programmable gate array (FPGA). Learning LabVIEW graphical programming instantly enhances your technical resume and increases your industry value.

10. Collaborate and Develop with a Worldwide Community of Engineers

Because millions of users have successfully adopted LabVIEW for a wide range of applications, you lower your risk by tapping into an extensive technical support network. In addition to gaining access to world-class phone support and discussion forums, you can find a wealth of example programs, white papers, and KnowledgeBase articles online. You also can take advantage of an extensive network of LabVIEW user groups, product partners, and select integrators around the world.


Try LabVIEW!

To Request for a 30-Day Trial CD Click Here


To Download NI LabVIEW 30-Day Trial Click Here


_______


Have an NI Technical Consultant call you! Click Here


Thursday, April 9, 2009

007.LabVIEW வின் மகிமை..

படங்களை பார்த்து நீங்களே தெரிந்து கொள்ளுங்களேன்!!

இப்படி இருந்த நான் !//////?????


!

!

!

!

!

!

!

!

!

!

!

!

!

!

!

!

!

!

!

!

!

!

!

!

!

!

!

!

!

1

!

1

!

!

!

1

1


!!!

இப்படி ஆயிட்டேன்!


பாடம் : இடத்தை அடைக்கும் கருவிகளை நாம் விலக்கி அவை அனைத்தையும் விர்சுவலாக பாவித்து உபயோகிக்க LabVIEW வழி வகுக்கிறது.இதனால் நம் வேலை அனைத்தும் சுலபமாக ஆகிறது.கொஞ்சூண்டு இடத்திலே, கொஞ்ச நேரத்திலேயே நீங்கள் உங்கள் ப்ரொஜெக்டை முடிக்கலாம்.


Wednesday, April 8, 2009

006.LabVIEW Short Cut Keys - for Windows OS UserS

Just have a glance of the LabVIEW short cut keys.
Though There are many shortcuts are being used in LabVIEW programmers community,here i listed few basic functions for the Beginners.


Align Items - Ctrl+shift+A
All Windows - Ctrl+shift+W
Change to Run Mode - Ctrl+M
Class Browser - Ctlr+shift+B
Copy - Ctrl+C
Create new VI - Ctrl+N
Cut Ctrl+X
Distribute Items - Ctrl+D
Enable Diagram Grid Alignment - Ctrl+#
Error List - Ctrl+L
Exit LabVIEW - Ctrl+Q
Find and replace - Ctrl+F
Full Size - Ctrl+/
Navigation Windows - Ctrl+shift+N
Open Project - OAlt+F E
Open VI - Ctrl+O
Page Setup - Alt+F T
Paste - Ctrl+V
Print Window - Ctrl+P
Redo - Ctrl+shift+Z
Remove Broken Wires - Ctrl+B
RUN - Ctrl+R
Save - Ctrl+S
Save all open VI - Ctrl+shift +S
Save All - Ctrl+Shift+S
Save VI as .. - Alt+F+A
Search the Labview Help - Ctrl+?
Select All - Ctrl+A
Show Context Help - Ctrl+H
Show Front Panel - Ctrl+E
Step Into - Ctrl+Down
Step Over - Ctrl+Right
Tile Left and Right - Ctrl+T
Undo Window Size - Ctrl+Z
Step Out - Ctrl+Up
VI properties - Ctrl+I
VI Revision History - Ctrl+Y


Hava a nice time and Enjoy the LabVIEW!

Monday, March 30, 2009

005.Before starting the practical…..


Note: If you are not installed the Evaluation or full software in your PC you may not follow me from this post onwards.
So ,please do it immediately.

Option 1
The Evaluation Version is Free of Cost:
You can download from this link:-
http://www.ni.com/labview/try/daq.htm
or
https://lumen.ni.com/nicif/us/lveval/content.xhtml
Just give some basic info for registering and start download.
Option 2
If you want LabVIEW 7.1 please let me know.
Note: This is most popular version of LabVIEW world.
The current version licensed copy (Ver 8.6) you can’t install more than once unless otherwise National Instrument’s permission.
How to launch the LabVIEW?
(You might have the ICON in your desktop?! after installing the software)

Check the below Images.
Image 1:-


The second image you have to double click “Blank VI”.
(we will study about the other sections later stage!)

In திஸ் picture you are viewing the Front panel and Block diagram.

LabVIEW VIs contain three main components: the front panel, the block diagram, and the icon/connector pane.

I explained about this in my previous post!)

You can edit Front panel by using Control Pallet
(By right clicking on Front panel you will get this ..i.e like Pop up Window)
You can edit Block Diagram by using Function Pallet.
(By right clicking on Block diagram you will get this.. i.e like Pop up Window)
“Tools Pallet” is the one which you can use for both.

(Click tool – tools Pallet to have this in Front panel or Block diagram)

What is LabVIEW?
Where can I get LabVIEW?
What versions of LabVIEW are available?
What operating systems does LabVIEW support?
How I can launch the LabVIEW?
What is front panel, Block diagram, function pallet, control pallet, tools pallet?
What are inside the Function,contol and tools pallet and how I can use them in my programming?

சி யு இன் த நெக்ஸ்ட் போஸ்ட் வித் எ பிரக்டிகல் Guide to make யு understand more.

Monday, November 10, 2008

004.Software Development method

(This lesson you will find in Computer based training at Basic 1 level)


Laboratory Virtual Instrument Engineering Workbench (LabVIEW) is a graphical programming language that uses icons instead of lines of text to create programs.
You can use a software development method to create LabVIEW solutions.
This method helps programmers in developing code that has greater potential to solve a problem as compared to writing code without a plan. This method also helps to make code more readable, scalable, and modifiable.

At the end of this topic, you will be able to identify steps in the software development method.

The software development method simplifies problem solving using software. The method uses a set of steps that has been refined over the years by software engineers. It is a strategy used by programmers of any programming language to create solutions. You use the software development method to create a solution to your problem

Steps in the Software Development MethodTo use the software development method, you need to complete the following steps.

Define the Problem

During this stage, you define what your problem is so that you can approach it with all the necessary factors identified. You can remove extraneous factors during this phase and focus on the core problem that you must solve. How you identify the problem initially can save you time when you design and implement a solution.

Design a Solution

After you determine the scope of the problem, you can design a solution by analyzing the problem. Part of analyzing the problem is identifying the inputs and outputs of the software, as well as any additional requirements. After you define the inputs and outputs, you can design an algorithm, flowchart, and/or state transition diagram to help you arrive at a software solution.

a.Identifying Inputs

b.Identifying outputs

c.Identifying additional requirements.

Design an Algorithm

After determining the inputs, outputs, and additional requirements, you can create an algorithm. An algorithm is a set of steps that process your inputs and create outputs.

Design a Flowchart

A flowchart displays the steps for solving the problem and can be considered as a visual design of an algorithm. Flowcharts are useful because you can follow complex processes of an algorithm in a visual way. For example, you can consider whether a specific step has two different paths to the end solution and you can plan your code accordingly.

Design a State Transition Diagram

State transition diagrams are a specific type of flowchart that are commonly used when creating LabVIEW state machines. State transition diagrams clearly indicate the states of a program and what causes the program to transition from one state to the next.

Implement the Design

In the implementation stage, you create code for your algorithm or flowchart. When writing code in a text-based language, the algorithm elegantly translates into each line of code, depending on the level of detail shown in the algorithm. Because LabVIEW is a graphical programming language, the flowchart works much the same way, where each block of the flowchart elegantly translates into each icon on the block diagram.

Test and Verify the Implementation

Testing is an important part of the software development method. By testing logical and illogical data, you can ensure that the inputs produce the expected result and that the code has effective error handling

Maintain and Update the Implementation

Maintenance is an ongoing process of resolving programming errors adding parallel construction changes to the original solution for a problem. For instance, in the furnace example, you may discover that after writing the code the customer wants to add a temperature sensor to another area of the oven to add redundancy to the system. Adding features to the program is easier if you plan for scalability in your software from the beginning.

Friday, November 7, 2008

003.Laboratory Virtual Instrument Engineering Workbench

LabVIEW is a Graphical Language,Industrial Standard ,widely accepted and used by world of Researchrs,Scientist and Engineers on various industries.

The expansion of the name LabVIEW is Laboratory Virtual Instrument Engineering Workbench
LabVIEW is developed by an American company called National Instruments Inc.

What is Virtual?
தமிழ்ல சொல்லனும்னா "இருக்கு ஆனா இல்ல".அதாவது பிசிக்கலா இல்ல ஆனா சாப்ட்வேர்-ல இருக்கு.இதைதான் "விர்ச்சுவல்" அப்படின்னு சொல்றோம்.

if you want to use a oscilloscope to measure a signal you no need to go and get an oscilloscope to measure.For you LabVIEW will provide an option to configure the oscilloscope to fulfill your needness.
So Physically the oscilloscope is not there but vitually it is avaialble.This is called Virtual Instrument.
I hope that you understand the term Virtual Instrument.
ok,
Coming back to the expansion of understanding the term LabVIEW...

Workbench?
Just imagine you have a bench to do your research or some experiments (any engineering activities).The same way LabVIEW paves you a platform or a bench to do your engineering activites.
The shrinkage of the Laboratory is Lab
Vitual Instrument is VI
Engineering Workbech called as EW.
So after combining all the shortcuts results us as LabVIEW.
Done!
Now you knew what is LabVIEW.
Some professional call LabVIEW as G Language.
G for Graphical not Google...:)

The main concept of the LabVIEW are the below 3 things.
Acquire
analysis
present

Cool Isn't it?
Keeping in the mind the above we will go now the 3 important things in G (Now onwards we will call as G ...OK?)
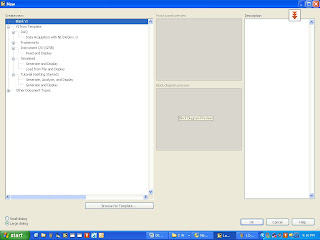
1. Front panel
2. Block Diagram
3. Icons and connector pane.


Frontpanel:

It is user interactive program window which comprises user Input and Output terminals for which users can input their feeds and enjoy their results.

The front panel is a combination of controls and indicators. (controls : inputs; indicators:outputs)
Just imagine you are riding a bike.
you are accelerating your bike by means of giving a rise in Accelerator.
This is the input given by the user.
Now you want to know the speed.
Look the speedameter indicator
This is called indicators or output.

Controls = Inputs from the User = Source of Data
Indicators = Outputs to the User = Destinations or "Sinks" for Data
They are generally not interchangeable, so make sure you understand the difference.

Block diagram

It is the coding area of the G.

Icons and connector pane.
The extension of the file is VI for the LabVIEW files.
you will make any VI as a SubVI (like a subprogram) into another VI.

Ok...dudes,

Time to interact more with LabVIEW...


Please download the Evaluation Copy of the LabVIEW software to go ahead further to learn LabVIEW.

It is legal and free to use for anybody.

Here is the link

If you don't have this software you cannot follow me further lessons.

if you want to launch LabVIEW online ..that is without installing in your computer you can launch if you have internet..

here is the link for online launching

I strongly recommend you to install the LabVIEW Evaluation software in your computer instead of online launching.
If you have any problem to get the evaluation copy do not hesitate to comment.

one more thing, normally you should not face any problems during installation but some of my friends encountered few problems during that time.
If you have any issues ..again remember do not hesitate..
Good luck and see you in the next lessons.